


A regular rig check is crucial for safety; here's how to inspect and tune your standing rigging, including masthead, spreaders, and bottlescrews

There are many ways a boat’s rigging can fail, but there will also, usually, be important telltale signs indicating that a problem is developing. A good regular check, therefore, will go a long way to helping you identify – and avoid – potential dangers.
It is possible to perform a check while the mast is in situ, but it will be a lot more enlightening if you can take a good look when it is out of the boat with the rigging slack, allowing you a better look at the fittings and the areas around them.
Insurance companies generally recommend you replace your standing rigging every 10 years, with most riggers agreeing this is a reasonable life expectancy. So what preventative measures should you take to ensure your rig will last that long, safely and securely?
Regular checks are the key. But if there’s anything you feel unsure about, head to your nearest professional rigger and ask for their expert advice.
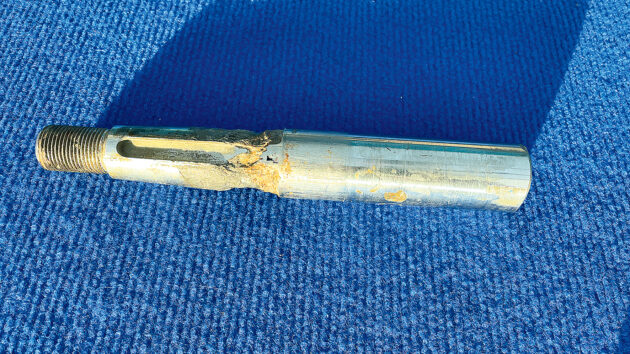
This sheared rod rigging led to an ARC yacht losing its rig. Photo: Graham Snook/Yachting Monthly
Gooseneck and boom
The first area you should check is the gooseneck. Make sure the fittings are securely riveted on and have no movement. Gooseneck pins shouldn’t be bent, and toggles should only move in the way they’re supposed to move.
Pack them with washers (nylon ones are cheap, and effective at packing out gaps) to stop any vertical movement. Check the boom’s fittings, especially the kicker attachment, for any movement.
Masthead
Take a good look around the masthead unit. Some are welded, some are bolted in. Either way, look closely for cracks around the loaded areas.
Check for wear and excessive slack around the areas where the rigging is attached, and make sure all split pins are in place and properly opened out. Then check for chafe around the masthead area. Aluminium is relatively soft, so it doesn’t take much to damage it, potentially producing a sharp edge that will chafe halyards quickly.
Spreader area
This is a high-load area, so check the spreaders don’t have excessive play and are clamped to the rigging at their outer ends to ensure they sit at the same height on each side. Check the rigging attachments at the mast end carefully for cracks and excess wear.
If a running backstay or spare forestay has been rubbing along the spreader, check it hasn’t worn through the casting.
Don’t let your rigging screw reach this state, as found by surveyor Ben Sutcliffe-Davies, Photo: Graham Snook/Yachting Monthly
Swage fittings
Swage terminals are the most common way of terminating rigging and while they are very reliable when made correctly, they can also cause stress where the wire enters the swage fitting. If the end fitting doesn’t align properly high loads can be put on the wire where individual strands may fail just inside the stem of the terminal.
Look carefully for any signs of broken strands. Toggles, tangs and T-terminal attachments need to be looked at carefully for signs of wear and cracks.
Lower mast area
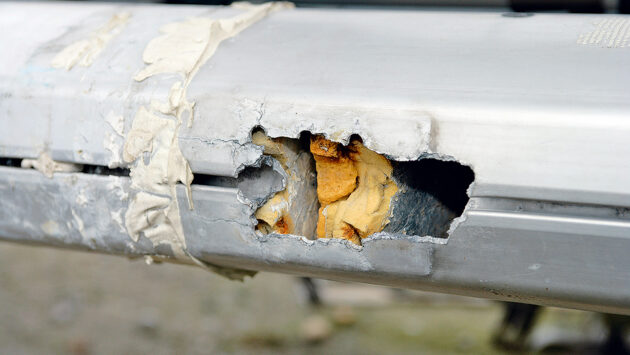
Run your fingers along the mast wall on either side of the halyard exits. Any bumps either side of the exit may be an indication that the mast has been overbent and stressed.
Bumps could be a sign of buckling in the mast wall. High load areas such as the boom and kicker goosenecks also need careful checking for signs of wear.
Heel plug
Whether it be keel-stepped or deck-stepped the heel plug at the bottom of the mast has to support all the compression in the rig. The alloy mast tube sits on a lip on the cast alloy plug.
If there is corrosion between the mast wall and the plug it can swell the mast wall and risk overloading other areas of the mast.
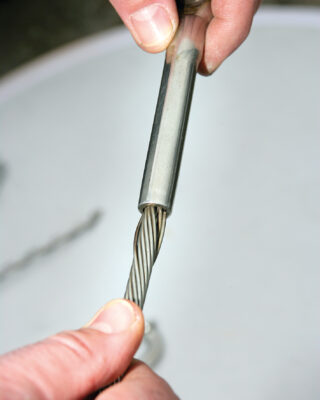
Check the condition of rigging wire at the swage terminals. Photo: Graham Snook/Yachting Monthly
Sheaves and corrosion
Sheaves should turn. If they stop turning, they will begin to wear, which means they will never move again. Free up and lubricate any stuck sheaves (a kettle-full of hot water is ideal for this).
If in doubt, drive out their retaining pins and check all the bearing surfaces. Most halyard sheaves are made of high-load plastics which make them less likely to corrode and jam, but seized halyard sheaves are still very common, especially if a bearing and/or its sheave pin has worn.
This can lead to a series of issues including excess chafe problems with halyards. As masts are generally built from aluminium alloy with steel fittings, corrosion can be an issue, particularly if the two materials are not insulated. Applying zinc chromate paste to mast wall fittings before they are refastened is a simple solution to this problem.
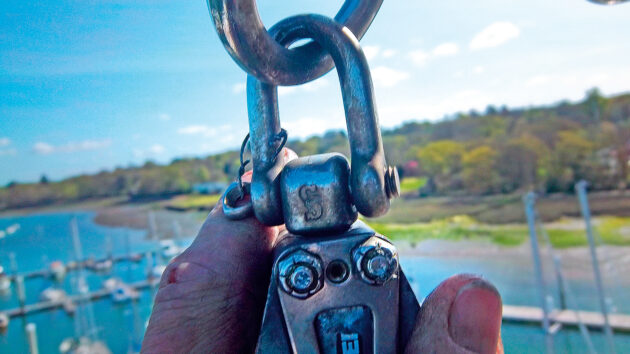
If shackles are bent or starting to wear, they should be replaced. Photo: Graham Snook/Yachting Monthly
U-bolts and shackles
These can wear on each other, leading to failure – so check regularly. It’s also worth tightening up shackle pins and mousing them with a plastic cable tie or Monel wire.
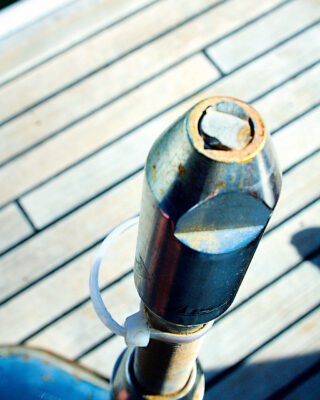
Bottlescrews
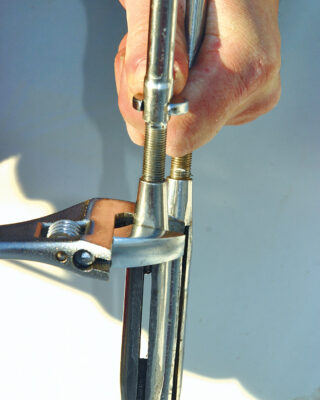
You should be able to move bottlescrews freely and shouldn’t have any cracks or discolouration. It’s important that you never force a jammed bottlescrew as you run the risk of stripping the thread.
Instead, apply some penetrating oil to seep in first.

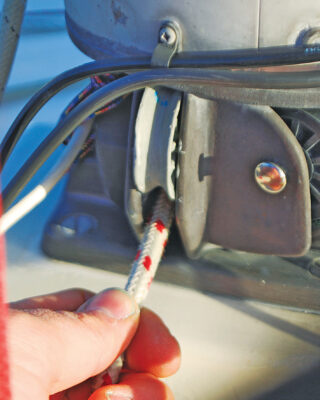
If your roller furling doesn’t move freely inspect the drum. Photo: Graham Snook/Yachting Monthly
Roller furling
Your roller-furling gear should be easy to use. If it’s difficult, inspect and service the drum. It’s not unknown for the rotation load on a stuck drum to unwind a compression terminal, leading to the loss of a rig.
Flush it with a hose to free it from salt, then keep it moving with a dry silicone lubricant.
Inspection intervals
A detailed rig check will rarely take more than a couple of hours to complete and should always be carried out prior to any long passage or extended cruise. When inspecting your rig, it’s sensible to make an inventory of all the parts and their dimensions, as well as taking photographs of them.
It’s also advisable to un-step the mast every few years to check it over thoroughly at ground level. It makes close inspection of areas like the spreader roots, mast terminals and halyard sheaves a great deal easier.
Look up along the luff groove to check the mast is straight. Photo: Lester McCarthy
Inspection top tips
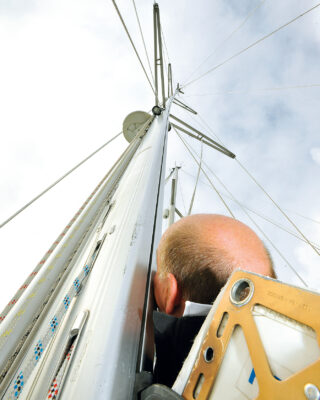
If you lie down on the foredeck you can check the masthead and other fittings with a good pair of binoculars – saving you a trip up aloft!
Never force dry bottlescrews – apply a lubricant such as Tef-Gel or penetrating oil to the threads before turning them.
Don’t use excessively long tools for extra leverage on the bottlescrews. If you can feel the load, you’re less likely to strain or break anything.
Most boats will flex to some extent when the rig is properly tensioned. If you’re concerned about excessive bend, take it easy, use a straight edge across the deck to check for movement, and seek advice.
A loose electrical connection can set up a nasty bit of galvanic corrosion, with masts literally being eaten away – so check all contacts and wires to make sure they’re not leaching current.
When removing the rig (for over-winter storage or to get work done), mark the bottle-screws with PVC tape before undoing them. If you know your boat sailed well and you want to keep it the same the next time you’re out on the water, tape both ends of the thread where it meets the clevis pin.
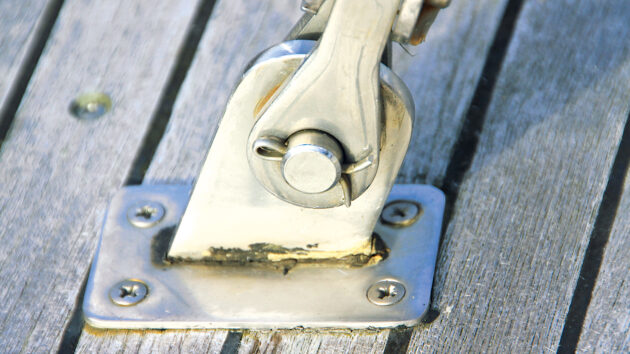
Vang and gooseneck attachment points have been known to fail catastrophically. Photo: Graham Snook/Yachting Monthly
You can then wind it back to these fixed parameters to replicate the perfect mast setting. Ensure any taping of screws or pins cannot trap water, which will in time cause corrosion.
If you are taping over sharp edges, self-amalgamating tape will last longer than electrical tape. Wash all moving parts with fresh water to remove salt residue.
Use a silicone-based lubricant regularly to keep moving parts free-running. Avoid contact between dissimilar metals – use an anti-corrosion paste when using screws or rivets, and use plastic tape to create a barrier layer between fittings.
Rake out and renew sealant around through-hull fittings to prevent water ingress. If you are taking your rig down, take the opportunity to remove deck fittings and re-bed on new sealant.
It’s a good idea to have your rig professionally inspected every three years, and then let your insurance company know that you’ve had the all-clear. If in any doubt, ask a professional rigger to tune your rig for you and take lots of notes or even a video.
Turnbuckles should be marine-grade stainless steel or bronze. Photo: David Harding
How to tune your rigging
The primary reason for making sure you have correct rig tension is safety. A well-tuned rig will ensure all of the strain is taken by the correct elements of the mast, spreaders and wire rigging.
A poorly supported mast, on the other hand, will be put under a number of unwelcome stressors, resulting, in extreme cases, in dismasting. So, next time you’re sailing close-hauled in a good breeze take a look up the mast.
Are the lee shrouds slack? If the top or middle of the mast is sagging to leeward it’s not properly supported. If the rig is uneven side-to-side, you’ll experience a frustrating difference in power and point of sail on different tacks.
One solution is to have a professional rig-tune, which will take around one to two hours. But bear in mind, even if you have an expert tune your rig for you, it will stretch over time (known in the industry as ‘creep’).
This is particularly significant in the first 12 months of new rigging, and riggers will schedule a re-tune after a year to address this. Also, as sails stretch, rig adjustments are necessary, so it’s worth knowing how to tune your rig, or at least recognise when it needs doing.
Rig tuning will differ from boat to boat, depending on a whole range of factors from the aspect ratio of the rig to the shroud base, roller-reefing system, spreader type and more. You may be able to find instructions from your boatbuilder. If not, consult with a sailmaker or rigger.
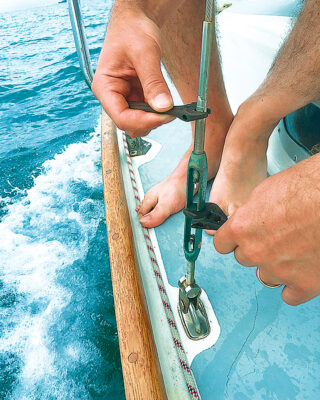
Use a second spanner to hold the shroud still when tensioning the bottlescrew. Photo: David Harding
Types of rig
The Bermudan rig is the most common, and there are two main types: masthead (backstay and forestay, both attached at the masthead), and fractional (forestay attached below the masthead).
The fractional rig, which supports a larger main and smaller headsail, is more ‘tuneable’ but also more demanding to tune and keep well-tuned.
Adjusting rig tension
Some forestays on yachts with headsail furling are a fixed length, but all other shrouds and stays are usually adjustable, achieved by tightening or loosening the thread on the bottlescrews at the bottom of the stays where they are attached to the deck.
For the initial set-up, the boat should be level. A finger berth will allow you to get off the boat to assess whether the mast is upright.
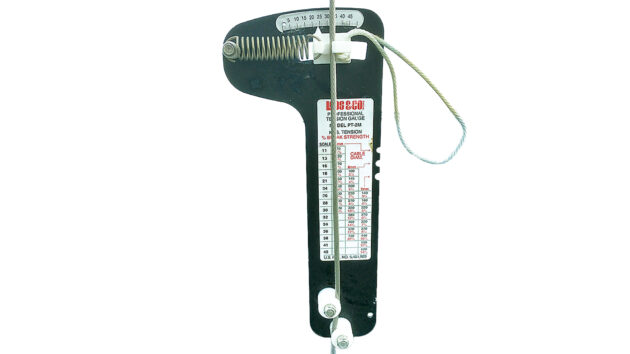
The simplest way to check tension as you wind down the bottlescrews is to use a rig-tension meter
While experienced riggers will be able to check tension by feel at the dockside, the simplest way to check tension as you wind down the bottlescrews is to use a rig-tension meter, such as the Loos or Spinlock Rig Sense. Once you know the diameter of the wire, the meter will give you the load both in kilograms and as a percentage of its breaking load.
If you don’t have a tension gauge, you can calculate the percentage of a wire’s breaking load by measuring its stretch. Most cruising boats have rigging made from 1×19 wire.
Normally over a distance of 2m: when 1×19 wire as stretched by 1mm over a 2,000mm length, it’s at 5% of its breaking load whatever its diameter. If in doubt, a rigger will be able to explain how to work out the correct tension values.
If sheaves stop turning they will begin to wear.
Fractional vs masthead tuning
Masthead configurations with in-line spreaders need less cap-shroud tension than swept-spreader fractional rigs. This is because in-line caps are only supporting the mast laterally.
The backstay stops it moving forwards, so each wire has a separate, clearly-defined role. Aft-swept caps support the mast both laterally and fore-and-aft. Being swept aft typically about 25°, they need to be under a lot of tension to keep the forestay tight.
Check chain plates routinely for signs of corrosion, and take the opportunity to rebed with sealant if you’re having the rig pulled
Cap shroud tension
Because they’re also at a much shallower angle to the mast, they bear between three and five times the load of the forestay. With fractional rigs, then, it’s vital to keep the cap shrouds tight.
If they’re too loose, the forestay will sag too much, the headsail will become too full and its leech will be too tight. Then the boat will become unbalanced, heel too far, make more leeway and lose both speed and pointing ability.
Structurally, under-tensioned rigging with a swept-spreader rig presents a problem in addition to the issue of snatch loading. Tension in the leeward cap shroud is important in keeping the mast in column [in place], to the extent that Loos and Co (the manufacturer of the popular rig-tension gauges) states that a mast loses 50% of its lateral stiffness when the leeward cap goes slack.
When this happens, the mast is effectively hinging around the forestay and the windward cap shroud and is far more prone to pumping as the boat bounces around.
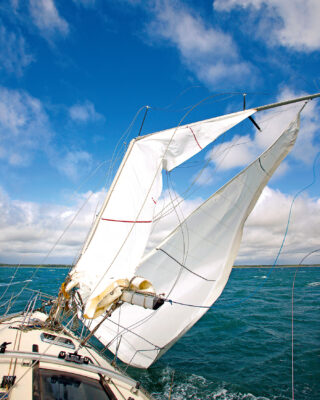
Overly stressed rigging on a poorly supported mast can lead to a dismasting. Photo: Graham Snook/Yachting Monthly
Rigging materials
Rigging materials have not changed for the everyday cruiser. Steel wire continues to be the most common type of rigging due to its low cost, reliability and tensile strength. The advantage of this is that strand fractures and buckles are easy to spot.
Most rigs are set with 1 x 19 wire (a centre strand, 6 twisted around the core, 12 twisted in the opposite direction in outer layers). Rod rigging, on the other hand, is solid stainless steel shaped into bars.
This stretches less and has greater strength, hence its use on racing yachts with high-tension rigs. The disadvantages are its shorter lifespan and that it gives no warning of failure, which can be catastrophic.
If bent too much, hidden damage can occur, which is only revealed by a non-destructive dye test. Fewer boatbuilders opt for rod rigging these days due to high manufacturing costs.
Fibre rigs have developed greatly in recent years and it’s possible to have both standing and running rigging made of products such as carbon fibre, Spectra, Kevlar and other types. Extremely stable and lightweight, such rigs are also very expensive and usually confined to larger performance yachts.
Working with the shrouds and stays, you have toggles, rigging bolts, turnbuckles and terminals, all of which should be stainless steel quality A4 or bronze, and should allow the shrouds or stays to move slightly. Chainplates and the entire hull should be able to absorb the loads from the rig.
It’s a good idea to familiarise yourself with how the rig load is supported so you can keep an eye on it. Moisture or grounding damage, for example, can weaken the structure or corrode hidden parts of chainplates or welds.
Enjoyed reading this?

A subscription to Yachting Monthly magazine costs around 40% less than the cover price, so you can save money compared to buying single issues.
Print and digital editions are available through Magazines Direct – where you can also find the latest deals.
YM is packed with information to help you get the most from your time on the water.
-
-
- Take your seamanship to the next level with tips, advice and skills from our experts
- Impartial in-depth reviews of the latest yachts and equipment
- Cruising guides to help you reach those dream destinations
-
Follow us on Facebook, Twitter and Instagram.
Note: We may earn a commission when you buy through links on our site, at no extra cost to you. This doesn’t affect our editorial independence.